news06
Company News

Printing design principles for camping gas cartridge

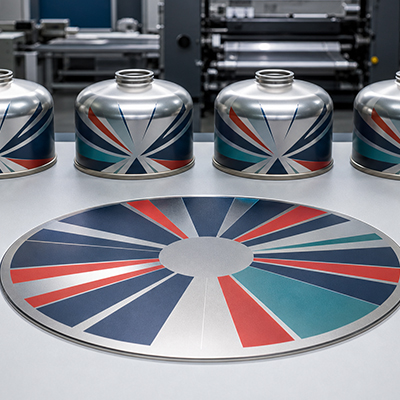
Printing design principles for camping gas cartridge The camping gas cartridge produced by Bluefire, compared to the refrigerant gas can that require heat transfer printing, need the artwork to be pre-printed on the material of tinplate sheet. The raw material used to make the body of the camping gas cartridge is a circular tinplate. Therefore, we need to convert the printed artwork into a circular shape, as shown in the following pictures: As a professional manufacturer of camping gas cartridge, Bluefire offers the following three suggestions regarding the printing artwork:   Vertical text arrangement Camping gas cartridges are the type of two-piece cans. During the stretching process, the tinplate extends vertically. If the text is arranged horizontally, it will form a wavy shape. Therefore, we recommend that the text be arranged vertically, in line with the direction of the tinplate’s extension. The three cans in the following pictures have their text arranged vertically. The text and patterns should be placed as close to the top as possible. This is related to the particularity of the stretching process. The closer to the bottom, the greater the deformation of the tinplate and the patterns. Therefore, Bluefire suggests placing the text and patterns in the upper half of the jar (approximately 2/3). Please look at the picture below. The text and pattern should be placed as close as possible within the red frame at the top. The base graphics for printing should be irregular shapes, such as scattered mountains, flames, abstract lines, etc. Since the stretching deformation of the tinplate is random and uncontrollable, straight lines will become curves, and circles will become ellipses. Therefore, we can choose some disordered patterns or irregular lines as the base graphics for the printed patterns, especially the lower part of the camping gas cartridge. Or only the color, without the pattern.

news07
Company News

The reverse mechanism of the bottom of a camping gas cartridge

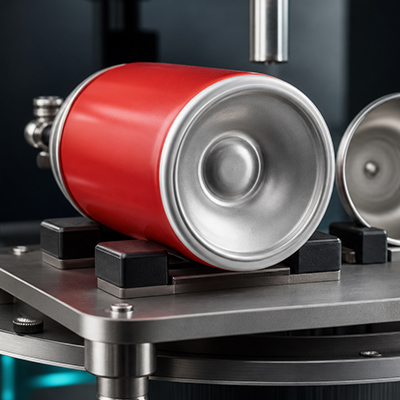
The reverse mechanism of the bottom of a camping gas cartridge Author: Bluefire  Date: 2026-03-24 It is well known that the bottom of an aerosol can is concave, and the concave bottom is used to support the pressure inside the can. The camping gas cartridge produced by Bluefire comply with the EN417 standard. According to Clause 4.2.2 of EN417, all our camping gas cartridge must have concave bottom. 4.2.2 Gas cartridges with an outside diameter of 40 mm and above shall be provided with a concave base. According to Clause 4.2.5 of EN417, the bottom for camping gas cartridge should reverse before the can leaks when the internal pressure reaches the threshold. 4.2.5 The concave form of the base of gas cartridges with an outside diameter greater than or equal to 40 mm shall reverse in form before any leak appears or rupture occurs. However, for three pieces construction cartridges with valves, with an outside diameter greater than or equal to 40 mm, either the concave form of the base shall reverse or the domed top shall permanently extend before any leak appears or any rupture occurs. For the camping gas cartridge produced by other manufacturers, when the internal pressure is too high, these cartridges will directly detach from the connection point between the bottom cover and the can body, without causing the bottom cover to reverse. The design criteria for Bluefire: the burst pressure is between 18 – 22 bar, mainly around 20 bar. So how does Bluefire design to avoid failure: The shape of the concave surface of the bottom cover is specially designed to provide sufficient support. A platform with a diameter of approximately 10mm is manufactured in the center of the concave of the bottom cover. When the internal pressure in the cartridge is too high, the bottom cover will first start to reverse from the central platform. Bluefire uses high-quality and stable raw materials to manufacture the bottom cover, in order to ensure the stability of the burst pressure. By seen the picture above, a radial pattern has been formed on the surface of the bottom cover. Bluefire has extensive experience in manufacturing camping gas cartridge, ensuring both performance and the stability of quality.

news08
Company News

The raw material selection for the 2-piece can body

The raw material selection for the 2-piece can body The types of iron plates we commonly refer to include: tin-plated iron(tinplate), chrome-plated iron(chromeplate), zinc-plated iron, and so on. Among them, zinc-plated iron is not suitable for use in printing and packaging. Generally, we use zinc-plated iron to make outdoor products such as water buckets and chimneys that are resistant to rust. Tinplate and chromeplate are commonly used materials for printing and packaging, and are widely applied in metal packaging fields such as aerosol cans and gift boxes. The base plates of the two materials are the same, but the surface coatings are different, resulting in different properties and uses. Bluefire uses chromeplate for the body of the camping gas cartridge, and the following are the considerations: Chromeplate has better printing performance than tinplate, that is, printing adhesion. In the stretching process of the camping gas cartridge, the artwork is first printed on the iron plate and then stretched to form, which requires that the printed pattern must firmly adhere to the iron plate without falling off. Chromeplate has the same mechanical properties as tinplate, ensuring the strength and safety of the can body. Chromeplate is cheaper than tinplate. The main reasons are two: Firstly, tin is a metal much more expensive than chrome. Secondly, the chrome layer is thinner than the tin layer, approximately 1/50 of it. Therefore, using chromeplate for the body of the camping gas cartridge is a more optimized choice by Bluefire.   The below figure shows a test report of chromeplate: Conversely, Bluefire uses tinplate for the body of the refrigerant cans. There are the following considerations: Tinplate has better rust prevention properties than chromeplate. We directly use tinplate(without printing) to stretch and make the body of the refrigerant can. After stretching, there is a process of washing with water, and the tin coating can effectively protect the cans from rusting. The inner part of the 2-piece refrigerant can has no spray coating. The tin coating can keep the can free from rust before filling. The thickness of the tin layer must reach 5.6 g/㎡ to have sufficient rust prevention ability.   The below figure shows a test report of tinplate: Furthermore, Bluefire uniformly use tinplate to make the bottom of the 2-piece cans(both camping gas cartridge and refrigerant can). The tin layer thickness reaches 8.4 g/㎡at least. Not only is it rust-proof, but it also has a beautiful appearance.

news09
Company News

Guide to Safe Use of Camping Gas Canisters

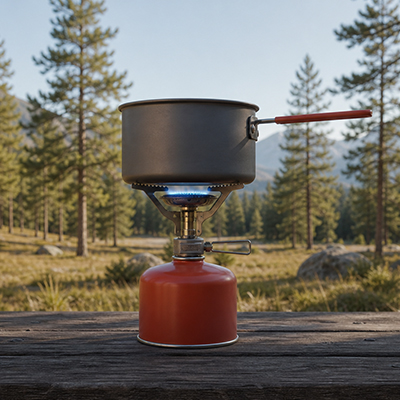
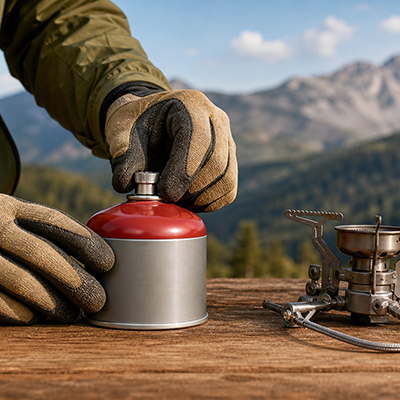
Guide to Safe Use of Camping Gas Canisters — Bluefire Official Beginner’s Essential Reference Manual Purchasing and First Use: Beginners, don’t skip this first step! Look for the EN417 mark — That means the valve fits nearly every stove on the market; no more “I bought the wrong one” panic. Pick cans less than two years old for the freshest, cleanest gas. Give it a quick “health check” when it arrives — no dents, no chipped paint, and the valve should spin as smoothly as a water-bottle cap. First ignition test (open outdoor area only!) — connect your stove, light it for 10 seconds. You want a steady blue flame with zero popping sounds. Turn it off, lean in close—no gas smell whatsoever. That’s your green light. Pro move: film those 10 seconds on your phone. You’ll have a perfect reference if anything ever feels off later. Tip: You can record a video of the ignition test with your phone for future reference in case of problems. II.Never use the stove in a completely enclosed vehicle. Cooking under a rain shelter on a rainy day: Use a windbreak to surround the connection. If rainwater enters the valve, it will rust, potentially leading to gas leaks later. Suddenly smelling a faint gas odor (the moment that panics beginners the most): Don’t panic! Three steps – 1. Turn off the valve. 2. Disconnect the canister. In winter, above -5℃: Put the canister inside your down jacket to warm it up for 30 seconds before connecting it to the stove. Never use hot water, a lighter, or throw it near a fire. III. Storage and Transportation Quick Reference Chart (Suggested to take a screenshot and save to your phone’s photo album) Scenario Recommended Practice Never Do This Home storage Balcony, garage, ventilated cabinet; upright with 30 cm space around it Kitchen drawers, under the stove, bedroom, under the bed Self-driving car trunk Original cardboard box + towel/foam wrap; secured in the coolest corner Dashboard, rear seats exposed to direct sunlight With power banks / drone batteries Separate mesh bags; best to place a hard plastic board or thick book in between Same inner pocket or compressed together High-rise apartment Next to outdoor AC unit, locked metal box or sealed plastic box Any indoor location Idle for more than six months Every 3 months: invert and shake — safe only if you hear no “sloshing” liquid sound Leave forgotten in a corner or damp basement Moving / mailing / air freight Fully release gas, tape the valve, label “EMPTY” before packing Mail or fly with any residual gas   Disposal and Recycling: The step that beginners are most likely to get wrong Use until completely silent → Invert and continue to release gas for 3-5 minutes → Write “empty can” with a marker → Hand it over to an outdoor store, scrap metal recycling point, or community designated recycling day. Never puncture empty cans with nails or knives, and never throw them into a fire. Many cities have “old can trade-in” programs at outdoor stores, where you can get a few dollars off by bringing them in. Follow these steps in critical moments to avoid panic. When camping with friends for the first time, teach them these three steps 5 minutes in advance so everyone feels more secure. Bluefire hopes that every beginner will make safety a subconscious action, leaving worries behind and enjoying the starry sky, campfire, and hot coffee tonight. May this “Beginner’s Guide” be the thinnest yet most reliable page on your camping journey. — Bluefire Official Team

news10
Company News

Guide to Safe Use of Camping Gas Canisters

Guide to Safe Use of Camping Gas Canisters — Bluefire Official Beginner’s Essential Reference Manual Purchasing and First Use: Beginners, don’t skip this first step! Look for the EN417 mark — it’s a small circle with numbers on the packaging. That means the valve fits nearly every stove on the market; no more “I bought the wrong one” panic. Pick cans less than two years old for the freshest, cleanest gas. Give it a quick “health check” when it arrives — no dents, no chipped paint, and the valve should spin as smoothly as a water-bottle cap. First ignition test (open outdoor area only!) — connect your stove, light it for 10 seconds. You want a steady blue flame with zero popping sounds. Turn it off, lean in close—no gas smell whatsoever. That’s your green light. Pro move: film those 10 seconds on your phone. You’ll have a perfect reference if anything ever feels off later. blog 4 1 Tip: You can record a video of the ignition test with your phone for future reference in case of problems. II.Never use the stove in a completely enclosed vehicle. Cooking under a rain shelter on a rainy day: Use a windbreak to surround the connection. If rainwater enters the valve, it will rust, potentially leading to gas leaks later. Suddenly smelling a faint gas odor (the moment that panics beginners the most): Don’t panic! Three steps – 1. Turn off the valve. 2. Disconnect the canister. In winter, above -5℃: Put the canister inside your down jacket to warm it up for 30 seconds before connecting it to the stove. Never use hot water, a lighter, or throw it near a fire. III. Storage and Transportation Quick Reference Chart (Suggested to take a screenshot and save to your phone’s photo album) Scenario Recommended Practice Never Do This Home storage Balcony, garage, ventilated cabinet; upright with 30 cm space around it Kitchen drawers, under the stove, bedroom, under the bed Self-driving car trunk Original cardboard box + towel/foam wrap; secured in the coolest corner Dashboard, rear seats exposed to direct sunlight With power banks / drone batteries Separate mesh bags; best to place a hard plastic board or thick book in between Same inner pocket or compressed together High-rise apartment Next to outdoor AC unit, locked metal box or sealed plastic box Any indoor location Idle for more than six months Every 3 months: invert and shake — safe only if you hear no “sloshing” liquid sound Leave forgotten in a corner or damp basement Moving / mailing / air freight Fully release gas, tape the valve, label “EMPTY” before packing Mail or fly with any residual gas Disposal and Recycling: The step that beginners are most likely to get wrong Use until completely silent → Invert and continue to release gas for 3-5 minutes → Write “empty can” with a marker → Hand it over to an outdoor store, scrap metal recycling point, or community designated recycling day. Never puncture empty cans with nails or knives, and never throw them into a fire. Many cities have “old can trade-in” programs at outdoor stores, where you can get a few dollars off by bringing them in. Follow these steps in critical moments to avoid panic. When camping with friends for the first time, teach them these three steps 5 minutes in advance so everyone feels more secure. Bluefire hopes that every beginner will make safety a subconscious action, leaving worries behind and enjoying the starry sky, campfire, and hot coffee tonight. May this “Beginner’s Guide” be the thinnest yet most reliable page on your camping journey. — Bluefire Official Team blog 4 2

news11
Company News

The stretching process of the tinplate 2-piece can

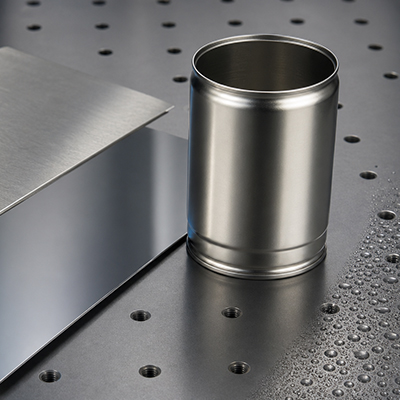
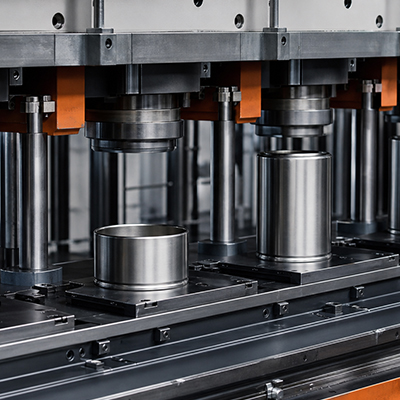
The stretching process of the tinplate 2-piece can Compared with the tinplate 3-piece cans, the main difference lies in the stretching process of the can body of the tinplate 2-piece cans. The can body of the tinplate 3-piece can is formed by rolling and welding a rectangular tinplate plate. While the 2-piece can requires a circular tinplate disk that is stretched through several processes. The tinplate disk is deformed by compression and reshaped into a new form. As shown in the following figure, from left to right, it is the gradual formation process of the can body of a 2-piece can. Stretching is a relatively technical process with the following characteristics: The raw material of the tinplate has high requirements. The mechanical properties of the tinplate should be good, it should be highly malleable, and there should be no impurities inside. Otherwise, during the stretching process, the tinplate may break or the body of the can may have pores causing gas leakage. The material of the mold requires high standards. It needs to use tungsten steel and be cooled with water. There is a limit to the stretching coefficient, so a taller can requires multiple stretches to be formed. Otherwise, the raw material will break. The stretching speed should be appropriate, otherwise the raw material will also break. Taking a 450gcamping gas cartridgeas an example, it can only produce a maximum of 15 cans per minute. This is also an important reason why a 2-piece can is more expensive than a tinplate 3-piece can.   As shown in the picture below, this is the molding process of the body of 450g camping gas cartridge. Bluefire company has been deeply engaged in the production of tinplate 2-piece cans for twenty years and has extensive technical expertise in the stretching process. We can provide customized 2-piece can products for our clients.

Products
Contacts
WhatsApp
Email